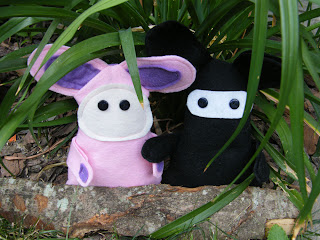
This is an easy little softie to whip up in an hour or less. Your little softie can be embellished as you see fit.

Materials:
-stuffing (I like the bamboo/organic cotton kind.)
-thread
-fabric or wool felt, two 8x12 pieces
-wool felt scraps for ear, arm, and face bits
-buttons for eyes (Note: Please do not use buttons on this if it will be used by a small child under three. Embroider, applique or use a decorative stitch on your machine.)
Simple Softie Pattern

Step 1:
With wrong sides facing place the smaller ear shape on top of the larger ear shape and sew the pieces together. You could do this by with embroidery floss as well. Repeat with the other ear and arms.
Step 2:
From the fabric, cut out 2 shapes similar to Grimace (the Mc Donalds character), narrow at the top for the head and thicker at the bottom for the body.
Lay the back piece right side up. Place all softie bits where they belong pointing in towards the middle. Lay the front piece right side down, pin, and sew. Leave a 1-2 inch hole for turning right side out.
Step 3:
Pink edges, and turn your softie right side out. Stuff your softie with batting, turn edge under and hand stich closed.
Step 4:
Now is the time to add any details to the face!! As you can see above, I added a little mask for my ninja softie. You can add eyes, whiskers, or whatever your little one will like.
These make a cute gift for a little one, a great last minute creation!


No comments:
Post a Comment